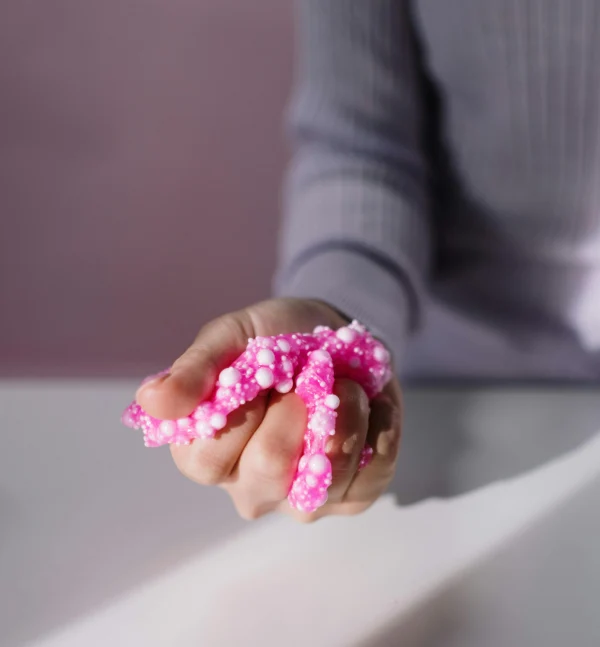
Welcome to the fun world of slime-making! If you’ve been searching for an easy and exciting slime recipe, you’ve come to the right place.
Making slime is not only a fun activity but also a great way to learn and create with your hands. Slime has taken the world by storm, captivating kids and adults alike with its gooey texture and endless possibilities.
In this guide, we will walk you through the ultimate slime recipe, ensuring that your slime-making experience is both enjoyable and educational.
Whether you’re a first-time slime maker or a seasoned pro, this guide has something for everyone. So, let’s dive into the ultimate guide to making slime that everyone can enjoy!
Why is Slime So Popular?
Slime has become incredibly popular among kids and adults alike. But why has this gooey substance captured the hearts of so many? Let’s explore the reasons behind the slime craze.
Creative Expression
Slime-making allows for endless creativity. From choosing colors to adding textures and scents, the possibilities are limitless. Kids and adults can express their creativity by designing their unique slime creations.
Educational Benefits
Slime is not just fun; it’s also educational. Making slime can teach valuable lessons in science and math. By mixing ingredients and observing chemical reactions, children can learn about polymers and non-Newtonian fluids in a hands-on way. This practical learning experience makes science exciting and accessible.
Sensory Play
Slime provides a fantastic sensory experience. The tactile sensation of playing with slime can be soothing and stress-relieving. It’s a great way for kids to develop fine motor skills and for adults to unwind after a long day.
Social Media Influence
Social media platforms like Instagram, TikTok, and YouTube have played a significant role in popularizing slime.
Countless slime-making videos and tutorials have inspired people of all ages to try their hand at making slime. The vibrant slime community online shares ideas, tips, and creations, fueling the craze even further.
In summary, slime’s popularity can be attributed to its creative potential, educational value, sensory benefits, and social media influence.
Now that we understand why slime is so beloved, let’s move on to the ingredients you’ll need to create your own slime masterpiece.
Ingredients You Will Need for the Perfect Slime
To make the perfect slime, you’ll need a few simple ingredients. Don’t worry; most of these items are easy to find and inexpensive. Here’s what you’ll need:
White School Glue (PVA Glue)
White school glue is the base of most slime recipes. It’s affordable and safe for kids to use. Look for glue that is labeled as “PVA” (polyvinyl acetate) glue, as this type works best for slime.
Baking Soda
Baking soda helps to firm up the slime. It’s a key ingredient in creating the right texture. Just a small amount is needed, so you’ll have plenty left over for other slime batches.
Contact Lens Solution
Contact lens solution contains boric acid, which reacts with the glue to form slime. Make sure the solution you use has boric acid and sodium borate listed in the ingredients. This is what helps to create the stretchy, gooey texture of slime.
Water
Water is used to dilute the glue and create the desired consistency. It also helps to mix the ingredients more easily.
Food Coloring (Optional)
Adding food coloring to your slime is optional but highly recommended. It allows you to customize your slime with vibrant colors. You can use liquid food coloring or gel food coloring, depending on your preference.
Glitter or Other Add-ins (Optional)
For extra fun, consider adding glitter, beads, foam balls, or other add-ins to your slime. These additions can create interesting textures and make your slime unique.
Alternative Ingredients
If you want to experiment with different types of slime, you can try using clear glue instead of white glue. Clear glue creates a transparent slime base, which can look amazing when combined with glitter or other add-ins.
Using safe and non-toxic materials is important, especially if kids are involved. Always check the labels to ensure the ingredients are suitable for children. Now that you have your ingredients ready, let’s move on to the step-by-step slime recipe.
Step-by-Step Slime Recipe: Easy and Fun
Let’s get started with our easy slime recipe. Follow these simple steps to create your very own slime:
Step 1: Mix the Glue and Water
Pour 1 cup of white school glue into a mixing bowl. Add 1 cup of water and stir until the glue and water are well combined. This mixture will be the base of your slime.
Step 2: Add Baking Soda
Add 1 teaspoon of baking soda to the glue mixture. Stir well to ensure the baking soda is fully incorporated. Baking soda helps to thicken the slime and gives it the right texture.
Step 3: Add Color and Add-ins
If you want to add color to your slime, now is the time to do it. Add a few drops of food coloring to the mixture and stir until the color is evenly distributed. You can also add glitter, beads, or other add-ins at this stage to make your slime more interesting.
Step 4: Add Contact Lens Solution
Slowly add 1 tablespoon of contact lens solution to the mixture. Stir continuously as you add the solution. You will notice the slime starting to form and pull away from the sides of the bowl. Continue mixing until the slime becomes more solid and less sticky.
Step 5: Knead the Slime
Once the slime has formed, take it out of the bowl and knead it with your hands. This helps to make the slime smooth and stretchy. If the slime is too sticky, you can add a little more contact lens solution until it reaches the desired consistency.
Troubleshooting Common Slime-Making Problems
Sometimes, things don’t go perfectly in slime-making. Here are some common problems and how to fix them:
- Too Sticky: If your slime is too sticky, add more contact lens solution, a few drops at a time, and knead it until it becomes less sticky.
- Too Runny: If your slime is too runny, add a bit more baking soda and knead it until it thickens.
- Too Stiff: If your slime is too stiff, add a little bit of water and knead it until it becomes more pliable.
By following these steps and troubleshooting tips, you’ll be able to create the perfect slime every time. Now, let’s explore some fun variations to try with your slime recipe.
Fun Variations to Try with Your Slime Recipe
Once you’ve mastered the basic slime recipe, it’s time to get creative! Here are some fun and exciting variations to try:
Glitter Slime
Add a touch of sparkle to your slime by incorporating glitter. You can use fine glitter or chunky glitter, depending on the look you want. Simply mix the glitter into the slime during the coloring stage. The result is a dazzling, shiny slime that catches the light beautifully.
Glow-in-the-Dark Slime
For a slime that glows in the dark, use glow-in-the-dark paint or powder. Mix the glow-in-the-dark material into the slime during the coloring stage. Once it’s fully incorporated, expose the slime to light for a few minutes, then turn off the lights to see it glow! This variation is perfect for spooky Halloween slime or a fun nighttime activity.
Scented Slime
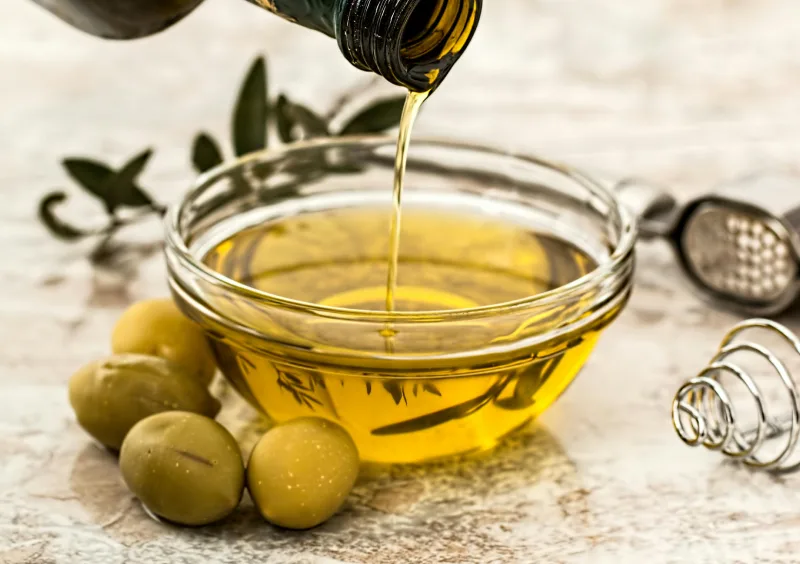
Make your slime smell amazing by adding a few drops of your favorite scented oil. Essential oils like lavender, peppermint, or citrus work well. Mix the scented oil into the slime during the coloring stage. Not only will your slime look great, but it will also smell delightful.
Fluffy Slime
For a soft and fluffy texture, try making fluffy slime. You’ll need shaving cream for this variation. Simply add a generous amount of shaving cream to the glue mixture before adding the contact lens solution. The result is a light, airy slime that’s fun to squish and stretch.
Butter Slime
Butter slime has a smooth, spreadable texture that’s similar to butter. To make butter slime, add a small amount of soft clay (like Model Magic) to the slime during the kneading stage. The clay will give the slime a buttery consistency that’s different from regular slime.
Cloud Slime
Cloud slime has a unique, fluffy texture that resembles a cloud. To make cloud slime, you’ll need instant snow powder. Mix the instant snow powder with water according to the package instructions, then add it to the slime during the kneading stage. The result is a soft, cloud-like slime that’s incredibly fun to play with.
Crunchy Slime
For a slime with a satisfying crunch, add foam beads or small plastic beads to the slime during the coloring stage. The beads create a crunchy texture that’s both fun to touch and listen to.
Clear Slime
Clear slime has a transparent, glass-like appearance. To make clear slime, use clear glue instead of white glue. Follow the same steps as the basic slime recipe, but be patient, as clear slime can take longer to form. The result is a beautiful, see-through slime that you can customize with colors and add-ins.
Experiment with different colors, textures, and scents to make your slime unique. The possibilities are endless, so let your creativity run wild!
Safety Tips and Cleanup for Slime-Making
Safety is important when making slime, especially when kids are involved. Here are some tips to ensure a safe and enjoyable slime-making experience:
Safety Precautions
- Use Non-Toxic Ingredients: Always use safe, non-toxic ingredients, especially if kids are making the slime. Check labels to ensure the materials are suitable for children.
- Supervise Kids: If kids are making slime, supervise them closely to ensure they follow the instructions and handle the ingredients safely.
- Wash Hands: Wash hands before and after making slime to keep everything clean and safe.
- Avoid Contact with Eyes: Make sure slime does not come into contact with eyes. If it does, rinse thoroughly with water.
- Do Not Ingest: Slime is not edible, so make sure kids understand not to put it in their mouths.
How to Store Slime Properly
To keep your slime fresh and stretchy, store it properly:
- Airtight Container: Store slime in an airtight container or a resealable plastic bag to prevent it from drying out.
- Cool Place: Keep the container in a cool, dry place. Avoid direct sunlight or extreme temperatures.
Tips for Easy Cleanup
Slime-making can be messy, but cleanup doesn’t have to be difficult. Here are some tips for easy cleanup:
- Use Disposable Materials: Use disposable materials like paper plates and plastic utensils for mixing slime to make cleanup easier.
- Warm Water and Soap: Clean bowls, utensils, and hands with warm water and soap. Most slime ingredients will dissolve easily in warm water.
- Vinegar Solution: For stubborn slime stains on fabric or surfaces, use a solution of vinegar and water. Apply the solution to the stain, let it sit for a few minutes, then blot with a clean cloth.
By following these safety tips and cleanup guidelines, you can enjoy a safe and stress-free slime-making experience.
Educational Benefits of Making Slime
Making slime is not just fun; it’s also educational. Here are some benefits that slime-making offers:
Science Learning
Slime-making is a great way to learn about science. When you mix the glue, baking soda, and contact lens solution, you’re creating a chemical reaction that turns the liquid ingredients into a solid slime.
This process teaches kids about polymers and non-Newtonian fluids in a hands-on way. It’s a practical and engaging way to introduce scientific concepts.
Math Skills
Measuring and mixing ingredients helps kids develop their math skills. They learn about measurements, proportions, and fractions as they follow the slime recipe. It’s a fun way to practice math in a real-world context.
Sensory Development
Playing with slime provides a fantastic sensory experience. The tactile sensation of squishing, stretching, and pulling the slime can help kids develop fine motor skills and hand-eye coordination. It’s also a great way to explore different textures and sensations.
Creative Expression
Slime-making allows for endless creativity. Kids and adults can experiment with different colors, textures, and add-ins to create unique slime creations. This creative process encourages imagination and self-expression.
Stress Relief
For both kids and adults, playing with slime can be a calming and stress-relieving activity. The tactile sensation of handling slime can be soothing and help to reduce anxiety. It’s a great way to unwind and relax.
Incorporating Slime into Learning Activities
Slime can be used in various learning activities to make education fun and engaging. Here are some ideas:
- Science Experiments: Use slime to teach kids about chemical reactions, polymers, and non-Newtonian fluids. Conduct experiments to see how different ingredients affect the slime’s properties.
- Math Games: Incorporate slime into math games by using it to teach measurements, proportions, and fractions. Have kids measure and mix ingredients to create their slime.
- Art Projects: Use slime in art projects to explore colors, textures, and creativity. Have kids create slime sculptures, paintings, or other art pieces.
By incorporating slime into learning activities, you can make education fun and engaging for kids. They can learn valuable lessons while having a blast with their slime creations.
It’s Fun!
Making slime is a fun, creative, and educational activity for everyone. By following this ultimate slime recipe and exploring different variations, you can enjoy hours of slime-making fun.
Whether you’re making slime for the first time or looking to try new ideas, this guide has everything you need to create the perfect slime.
Remember to use safe and non-toxic ingredients, follow the step-by-step instructions, and have fun experimenting with colors, textures, and add-ins. Slime-making is a fantastic way to learn, create, and play.
Share your slime creations with friends and family, and don’t be afraid to try new ideas.
Happy slime-making!